

Installing tiles
By Catalogs Editorial Staff
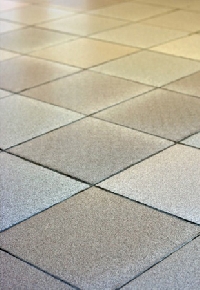
What should you know about installing floor tiles?
Installing tiles anywhere in a home definitely requires planning even for the most experienced contractor. Whatever area is destined for tiling or re-tiling, whether it be a floor or back splash or tile shower pan, the first step in the process is always the same; the area must be thoroughly cleaned and free of dust and debris. The second step is to establish the layout of the tiles. Once that is done, the process begins.What are some important things to know when installing tiles?
There are four basic steps to installing ceramic floor tile correctly. They are as listed below.
Before you continue reading about the Installing tiles there is a special announcement we would like to share with you. Catalogs.com has negotiated special medicare rates for our vibrant community of seniors. If you are over the age of 60, you can head over to our Seniors Health Section which is full of information about medicare. All you need is your zip code and a few minutes of your time to potentially save 100s of dollars on your medicare bills.
1- Know how to prepare and spread mortar
Prepare only enough mortar to be used within 30 minutes, as any more time will cause the mortar to dry out. Focus on setting only the full tiles first, leaving any cut tiles around the perimeter of the room for last. Spread a glob of mortar evenly on the floor within one section by using the straight edge of a notched trowel. Always be aware of your layout lines, as you cannot align the tiles perfectly without them.
~
2- Setting and spacing tile in a specific order
Begin setting the first tile in a corner, pressing down and twisting it a bit so that it will set in the mortar. Before proceeding with installing tiles, check the progress of this first tile by prying up a corner and looking on its back side. About seventy to eighty percent of the tile should be covered with mortar. The mortar is too dry and won?t work well if you don?t see anything. If all you see are parallel lines of mortar, the ridges are too shallow.
The layout lines are the map to guide you; set the remaining tiles so that they align to them. Uniform grout lines can only occur if the spacing between the tiles is consistent. Set the tiles tight to the front line and the right line of each section and leave a gap on both the left and the back side.
Once the tiles are all in place, the objective becomes making all of them level with each other. Some adjustments may be necessary, and a rubber mallet or grout float will allow you to put pressure on a corner or edge of a tile. At this point, you may need to either add or remove a bit of mortar to insure evenness.
After each section, you must clean up any mortar that has squeezed up between the tiles before moving on to the next. A putty knife or pencil works well for this task. One last check after leveling and cleaning before moving on will insure that you are ready for the next step. (Don?t bother checking until you are finished installing tiles as it will be a waste of time.)
3- How to set perimeter tile
One very effective strategy when setting perimeter tile is to set all the full tiles one day and the next day measure, cut and set the tiles along the edges. You will need a tile snapper or tub saw, which you can rent. This will allow you to work at your own pace so that each tile will be just right. Remember to measure each cut tile individually because the walls may not be square and you may need different widths for each tile.
4- Knowing when to back butter ceramic tile
This refers to the process of individually troweling tiles that are not directly on the floor and in places like under cabinets or in small areas. Use the notched trowel to spread the mortar on the back of the tile and set it with a good twist to make sure it contacts the surface.
No matter how elegant or simple your choice for the best flooring for a bathroom, the process of installing tiles must always be meticulous and time consuming if it is to have the desired effect.
Happy tile installations to all!
Popular Savings Offers


Free Catalog
Get FREE Catalog to browse Cabela's Camping products
.jpg)
Cabela's Camping

Free Catalog
Get your Free Catalog and shop the best selection and collection of Designer Drapery Hardware Products on the Clearance Sale

Designer Drapery Hardware
Free Catalog
Get your Free Catalog and shop the best selection and collection of Sturbridge Yankee Workshop Products on the Clearance Sale

Sturbridge Yankee Workshop

.jpg)

10% OFF
Get 10% off when you sign up for texts and free shipping on your first order over $50

The Lighter Side


.png?w=3840 "Order Free Catalogs from The Olive Press")

.jpg?w=3840 "Order Free Catalogs from Body Glove")


.png?w=3840 "Order Free Catalogs from Lands' End - Holiday")
.jpg?w=3840 "Order Free Catalogs from Mature Driver Tune-Up")


.png?w=3840 "Order Free Catalogs from giggle")

