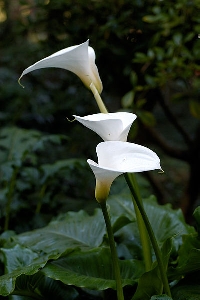
Learn how to take care of calla lillies indoors to preserve its exotic beauty
Native to Southern Africa, the calla lily is a stunning plant prized for its inverted bell shaped flowers and evergreen foliage. Its elegant shape is a symbol of simplicity and purity, and is often used as a visual centerpiece in flower arrangements.
The calla lily is not a true lily, but rather a tropical rhizome. Once you understand this plant’s needs, caring for one indoors – either in a cut flower arrangement or as a potted plant – becomes a simple, straightforward task.
Be warned, however, before you purchase your first potted calla lily, they are highly toxic if ingested. Be sure to keep them out of reach of children and pets.
Temperature and Light
As with any other tropical plant, the calla lily likes things a lot like we do: not too hot, not too cold. The ideal temperature for optimal blooms is between 65 and 55 degrees Fahrenheit. If you keep your home a bit warmer than this (as most do), just be sure to mulch the soil well to keep the bulb underneath nice and cool. If for some reason your home will drop below 55 degrees for a period of time, this would be a good time to let the plant go into its dormant phase for a couple of months.
Place your plant in a windowsill which gets lots of indirect sunlight. Too much sun can burn the leaves (and raise the ambient temperature too high); too little can push the calla lily into dormancy sooner than you’d like.
~
Soil and Water
Since calla lilies find their origins in the marshes of Southern Africa, it stands to reason that they like their soil consistently moist. Moist, but not overly wet, since the bulb could rot if it stands in water for too long. A good indication of how well you’re keeping your plant watered is the coloring of the leaves. If the leaves have dark green tips, it means you are watering too much; pull back. If they’re drooping, however, the soil may be dry. Check it and, if so, water immediately.
Regular potting soil, with a balanced pH of 6.0 – 6.5, works best for this flowering plant. If you are trying to get it to bloom, you can fertilize as often as once a month with bulb fertilizer. But you may find that when you fertilize the plant puts off black berries. These can be planted to grow new calla lilies, or simply discarded. Stop fertilizing once the plant blooms.
Pests and Disease
Calla lilies are prone to aphids and other small insects, but these can be easily removed with a solution of water and a little mild dish soap, or a commercial plant spray. Be sure to check the undersides of the leaves if you suspect and infestation, as many bugs like to hide there.
Potted calla lilies are susceptible to a few different diseases, most of which take the form of rot, mold, or mildew. The best defense your plant has against these issues is good drainage, so that the plant is never sitting in standing water for more than an hour. One way to ensure sufficient drainage, aside from choosing a pot with drainage holes at the bottom (or drilling holes in it, if there are none), is to place river rocks or pieces of broken pottery in a layer in the bottom of the pot before filling with soil. This creates more space at the bottom for the water to drain away from the root.
When the Plant Begins to Fade
You may notice your plant wilting, leaves turning yellow, the blossoms fading. If you have ruled out pests and disease, and know that the soil’s pH is within the required range, then it may just be time to let your plant have a rest. Calla Lilies, in more temperate climes, will go dormant for a season, and then be ready to come back to life when it gets warmer. If you’ve kept it blooming for most of a year via your excellent controlled conditions indoors, it is still a good idea to allow the plant to go dormant for a couple of months. This will revitalize it and promote more vigorous flowers the next season.
To encourage dormancy, pull back on the watering for a bit and allow the plant to fade entirely. Once it looks positively dead, dig the bulb out of the soil and allow it to dry. Store it in a cool, dark, dry place (do not store in plastic; a paper bag would work better here, since you don’t want to chance any moisture rot while it’s biding its time in your closet) for two months. Then, you can revive the bulb by repotting it in fresh soil (remember your drainage), and starting the watering regimen all over again.

