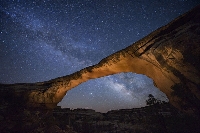
Helpful tips and strategies for taking excellent night photos
Taking great photos at night is challenging, but there are some basic strategies that will help you learn how to take night photos. While you may need to adapt your approach to the specific camera equipment you are using, most of these ideas should work for the average photographer wanting to know how to take night photos.
Night photos can be dramatic, artistic and offer a unique way to capture special events and vacation memories. Displayed in a special picture frame, a night photo easily makes the transition to “art.”
Conditions
Review the weather reports to determine the amount of expected cloud cover and precipitation forecast. It?s important to dress accordingly since good night photography requires patience and perseverance. In addition, the phase and position of the moon will affect the amount of available light and how you decide to compose your shot.
Some photographers prefer shooting at dusk because details and colors are more pronounced than with a black sky.
~
Equipment
Since you will be taking relatively long exposures of a second or more, bring a tripod. It?s very difficult to hold a camera still for more than 1/30th of a second without getting shaking. If your camera has a lockable mirror feature, it?s a good idea to use it to reduce vibrations.
A bubble level will help you to position the camera in the darkness. If your camera allows for remote operation, make sure you have your shutter cable. This also helps to eliminate shake since pushing of the shutter button is avoided. If you don?t have a remote option, using the timer is a backup option. A pocket flashlight also comes in handy to light up your camera?s controls and lens settings.
Camera settings
To get the best photos, use a camera that can be adjusted manually. Many newer cameras have very sophisticated automatic controls, but they don?t lend themselves very well to night photography. To get the best results, you will be shooting long exposures of several seconds. This is needed in order to allow more light to fully capture the image.
You should turn off the flash since this will only illuminate a few feet and may cause overexposure of the foreground and underexposure of your primary target. Only use it if you are shooting the foreground and not concerned about the background. Turn on the automatic bracketing if your camera has that feature. If you have automatic focusing and you are shooting multiple images of the same subject, use it on the first shot and then switch to manual. This will prevent the camera from constantly seeking a focus lock.
If you are using film, use high-speed film that will minimize the length of the exposures. For digital stills, the exposure index rating or ISO setting is provided that should correlate your results to what would be obtained with film at the same exposure.
Digital cameras are far superior to film in terms of light sensitivity, but it?s a bit trickier to produce high quality night photos because you may have both dark and bright objects in the same image. Take some time to study your metering system and understand the information it provides you.
Experimentation
Figuring out how to take night photos takes lots of trial and error. Try a variety of speed and aperture settings and see what works best. Until you see the results of what you are doing, it?s very difficult to gauge what you might be doing right or wrong. When you find a good combination for the specific conditions, make a note of the settings.
The obvious advantage of a digital camera is the instant feedback. If it has a histogram feature, use it often to check the exposure levels. Try using a small aperture with a long exposure to compensate for overexposure of stationary lights. If you are trying to avoid motion, use a larger aperture and a shorter exposure.
Summary
You can be very creative with long exposures at night with moving objects. For example, the headlights of passing cars will appear as a long stream of light trailing off into the distance. It?s one way of creating special effects without needing any special equipment.
There?s something magical about nighttime images that just isn?t possible to capture in daylight. The moon, stars, neon signs, and sparkling lights all come to life in ways that spark the imagination. Once you get the hang of how to take night photos, the sky?s the limit.”
Resources:
Exposures: Tips for taking great photos
Basic Digital Photography: how to take night photos
NonStopEnglish.com: tips for taking great photos at night

