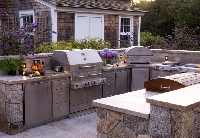
When you winterize your built-in grill great grilling next spring is guaranteed
The sight of the first robin of spring is usually a sign that barbecue season is just around the corner, unless you forgot to winterize your built-in grill back before the first snowfall. Do yourself and your grill a favor and spend some time preparing it for winter and it will save you time, effort and possible expense when you go to fire it up next spring.
One of the benefits to owning a built-in grill is that they are designed to be used during extreme conditions like winter. However, if you don’t to cook outside until spring, it’s a good idea to spend some time getting it ready for a period of inactivity.
The first step is to give your grill a thorough cleaning. Light the burners and run it on high for about 20 minutes. After extinguishing the burners, use a scraper or grill brush and brush the grill grates thoroughly while they’re still hot. Once the grill has cooled down completely, use soapy water to clean the grill grates. Take them out, rinse with water and let them dry completely. Take out all other removable drawers and parts and give them a good cleaning and drying.
Cabinets and drawers aren’t always completely moisture-proof, so remove utensils and accessories and store them indoors to prevent rust. Vacuum everything out and replace shelves, drawers and doors.
This is a good time to give your grill one last seasoning. Coat the grates with vegetable oil, run the grill on high for 20 minutes, let it cool completely and turn off the gas supply.
~
If your built-in grill has a sink or wet bar, disconnect the water hoses and open the faucets. Use an air compressor to blow out the hoses, then reconnect them and close the faucets. Do the same for the drain, disconnecting the hose and clearing it with compressed air. It’s a good idea to pour RV antifreeze in the drain trap. If you find any grill parts that are damaged or old, this is a good time to replace them.
Refrigerators may be cold on the inside, but they need to be prepared for cold on the outside. If your built-in grill has one, turn it off and empty the contents. Disconnect any hoses for water or ice makers and clear them with the air compressor. Clean the inside with soapy water and a disinfectant, dry it out completely and close to door.
Built-in grills have a wide variety of counter-tops, so consult your owner’s manual for the best method for cleaning and coating them for winter. The same is true when choosing a cleaner for cabinet doors and other surfaces. While some built-in grills have covers, most do better if left uncovered. Check your owner’s manual for recommendations.
Once everything is cleaned, closed and checked, turn off the power to your built-in grill using the main switch or the breaker in your circuit box.
It’s not a lot of work to winterize a built-in grill, but it’s worth the effort, especially when that spring robin reminds you that it’s time to fire things up and get grilling.

